Showing posts with label Linux. Show all posts

Wednesday, October 28, 2009

Choose the Fastest download Mirror of Ubuntu

Use the following procedure tutorial to select the fastest ubuntu mirror near to your location.

Procedure to Follow

First you need to launch Synaptic package manager from System > Administration > Synaptic Package Manager

Now go to select Settings -> Repositories.

Synaptic manager settings

Select Ubuntu Software tab In the Download From drop down, choose Other…

Click the Select Best Server button in the resulting dialog.Wait a minute (or perhaps more on a slow connection).

Testing best server is in progress

Once it’s finished,click on choose server

close everything and click Reload in the main Synaptic window.

Downloading package information in progress from your new mirror

This simple procedure picks the best mirror for you. This works for me very well so i would suggest you try this and see if it works for you or not.

If you have any other method which worked for you please let us know.

Tuesday, August 11, 2009

Convert Youtube videos to audio in Linux

After reading Martin’s fine article “Download Youtube Videos” today, I had to give a bit of a Linux perspective and show how to do this in the Linux operating system. Inititially I assumed this would have to be done via the command line, because that is how I have always done conversions. But I have found that many people do not like having to do such tasks from the command line. So I sat out to find a good (and by “good” I mean easy). It didn’t take long to find, it didn’t take long to install, and it didn’t take too long to get working the way I wanted (which means including mp3 support).

The tool I eventually settled upon is Elltube. Of all the available tools this was the easiest to install, get working, and the most reliable. With this tool you will find download and converting Youtube videos a nobrainer. There is only one small hitch. If you want to add mp3 support you will have to do some extra installation (In this case it means installing unsupported files). The distribution I will use for this tutorial is Ubuntu 9.04. I will illustrate converting videos into audio-only mp3 format. This is the format that causes issues with most users due to the necessary installation of mp3-supporting libraries.

Preparing for the installation of Elltube

The good news is that everything you need, outside of Elltube itself, will be located in the default repositories. The bad news? You will have to install restricted applications. What this means is that Canonical is not responsible for the updating of these files. With that said you will need to fire up Synaptic. I do not suggest you just open up the Add/Remove Software utility from the menu. Instead open up a terminal window and issue the command:

sudo synaptic

The above command will open up the full-blown Synaptic tool where you will need to do the following:

  1. Search for “lame” (no quotes).
  2. Scroll down until you see the “ubuntu-restricted-extras”.
  3. Mark “ubuntu-restricted-extras” for installation.
  4. Search for “ffmpeg” (no quotes).
  5. Mark “ffmpeg” for installation.
  6. Click Apply to install.

Once all of this has installed download the Elltube .deb file and save it to your ~/ directory. After this file download has completed open up a terminal window and issue the following command to install:

sudo dpkg -i ~/elltube_0.3-1_all.deb

which will install Elltube. You are ready to convert.

Converting a video to mp3 format

Figure 1

Figure 1

You will find Elltube in your Internet sub-menu of either your Main or Applications menu. When the Elltube application opens you will see the Main window (see Figure1). There isn’t much to this application from the GUI perspective – but it serves the purpose well.

The first thing you need to do is find a video you want to convert on Youtube. Let’s convert a live version of Rush’s La Villa Strangiato. Find the URl and then copy and paste into the

Figure 2

Figure 2

Youtube URL area. When you do this the details of the file will appear in the main window (see Figure 2). Now what you have to do is to select MP3 (audio only) from the Format drop-down and select a Save to location for the download and conversion. When the details are done, click the Download button and the process will begin.

When the conversion process is complete the “Video found!” message will change to let you know it is finished. When it has completed you will have your mp3 file in the Save to folder. You are ready to rock!

Final thoughts

Elltube makes the downloading and conversion of Youtube videos as simple as it gets. The ease at which this process is done makes the installation well worth it.

Monday, August 10, 2009

Howto setup Second IP address or Virtual IP address to your Networkcard in ubuntu

If you are a Network Administrator some time you need to assign more than ONE ip address (second ipaddress) to your network card of Ubuntu machine. For this you need to edit the /etc/network/interfaces file by adding the following lines . See the example below and make change according to your ip address settings

#vi /etc/network/interfaces

auto eth0
iface eth0 inet static
address 192.168.0.5
netmask 255.255.255.0
network x.x.x.x
broadcast x.x.x.x
gateway x.x.x.x

auto eth0:1
iface eth0:1 inet static
address 192.168.0.50
netmask 255.255.255.0
network x.x.x.x
broadcast x.x.x.x
gateway x.x.x.x

after entering the values save this file and you need to restart networking services in ubuntu using the following command to take effect of our new ipaddress.

After entering all the details you need to restart networking services using the following command

#/etc/init.d/networking restart

Thursday, August 6, 2009

Cheese: The Un-Cheesy Webcam Software for Linux Having tried Photo Booth on Mac OS X, I once wished to have that cool application on my Linux box. Th

Having tried Photo Booth on Mac OS X, I once wished to have that cool application on my Linux box. Then came Cheese, the GNOME application that is quite similar to that of Photo Booth. Utilizing GStreamer framework, it allows users to apply fantastic graphical effects while capturing photos or videos. Aside from the fun stuff, Cheese is loaded with handy little features.

I installed the latest version of Cheese, which is 2.26.0 on Ubuntu 9.04, and it works like a charm with my A4Tech (PK-730MJ) webcam. Cheese is available in all major distro repositories so Linux users should have no problem getting and installing it.

Cheese has a very simple and a no-nonsense graphical interface. If you want to take a photo, just click on the "Photo" button, then "Take a Photo". If you want to take a video, click on the “Video” button, then "Start/Stop Recording". You will see snapshots of the captured images and videos at the bottom where you can view them by double-clicking. By default, the captured images are saved at /home/username/Pictures/Webcam, while videos are saved at /home/username/Videos/Webcam.


Although not as plenty as those on Photo Booth, Cheese comes with a decent amount of unique visual effects that I’m happy with. Here's the current list of effects:

* Mauve

* Noir/Blanc

* Saturation

* Hulk

* Vertical Flip

* Horizontal Flip

* Shagadelic

* Vertigo

* Edge

* Dice

* Warp


You can also combine those effects by picking two or more of them, and then clicking on the "Effects" button to start recording videos or capturing photos with multiple effects.

Another good feature of Cheese is that it supports uploading of photos on Flickr provided that you have the "postr" package installed.

All in all, Cheese is a handy webcam application that should be installed by default on Ubuntu and on other popular distros because I can't think of any other webcam software for Linux that can rival even the basic functionality of Cheese. Although it will not turn your ordinary webcam into a security camera, it's very reliable, user-friendly, and it can be a lot of fun. I just hope that more fancy effects and useful features will be added to Cheese soon.

So what can you say about Cheese? Do you know of other webcam software for Linux that is better or is as good as Cheese?

Wednesday, August 5, 2009

WineXS – Simple graphical environment to configure Wine

Wine is an Open Source implementation of the Windows API on top of X and Unix.Think of Wine as a compatibility layer for running Windows programs. Wine does not require Microsoft Windows, as it is a completely free alternative implementation of the Windows API consisting of 100% non-Microsoft code, however Wine can optionally use native Windows DLLs if they are available. Wine provides both a development toolkit for porting Windows source code to Unix as well as a program loader, allowing many unmodified Windows programs to run on x86-based Unixes, including Linux, FreeBSD, and Solaris.

WineXS allows you to easily configure Wine by installing and removing software, editing the registry, managing files, and more.

Install WineXS in Ubuntu

first you need to download the file from where you want to run this installation in this example i am using /home/user

$cd /home/user

$wget http://tsx.nl/files/winexs-1.4.2.tgz

Now you need to extract .tgz file using the following command

$tar xvzf winexs-1.4.2.tgz

Now you should be having winexs directory now you need to go into this directory

$cd winexs

Run the following command to run winexs

$./winexs

Once it opens you should see similar to the following screen,Here you can install,remove software,install system files,wine configuration

Software Installation screen

Install System files screen

Wine configuration screen

This application is very easy and i personally like this.If you guys have any more tips on this please share here.

Tuesday, August 4, 2009

GyachE Improved : Yahoo! client for any linux operating system ( ubuntu,fedora etc. )

This Yahoo! client for Linux operating system supports almost all of the features you would expect to find on the official Windows Yahoo! client: Voice chat, webcams, faders, 'nicknames', audibles, avatars, display images, and more. Yet, it remains very light-weight and memory-friendly. GyachE Improved uses Gtk-2 for its user interfaces (Gtk-2 2.0.6 or better required).

To install GyachE Improved in ubuntu jaunty
Open sources.list
$ vi /etc/apt/sources.list
Add these lines to sources.list
deb http://ppa.launchpad.net/loell/ppa/ubuntu jaunty main
deb-src http://ppa.launchpad.net/loell/ppa/ubuntu jaunty main

Now update apt-get.
$ sudo apt-get updat
Install Gyachi
$ sudo apt-get install gyachi


Other linux users please see http://gyachi.sourceforge.net/download.shtml

Arista - Convert videos easily on Linux

Arista is a wonderful video format converter that anyone can use without any knowledge, its performance is really very simple, but its main purpose is to streamline the full process of converting a video giving a few options that are easily understood for us users: Convert to Apple iPod, Cowon D2, Computer, DVD Player, Sony PSP or Sony Playstation 3.

One of the features I liked most of Arista is the ability to preview video looks like without having to wait until it finishes its conversion, in this way can we know if we feel we must correct or select another.
Arista also allow us to extract and convert video or DVD directly from any camera connected to your PC without the need for additional software.

Download Arista


FSlint - Clean and organize your Linux

By the time now, we all know that all applications installed on our PC are slowly filling our system with files, then comes a time when controlling everything in our computer becomes virtually impossible. If you want your computer to be running like the first day you had it. Put FSlint the task of cleaning and organizing your Linux very easy.
Thanks to the implementation of FSlint. With a single click we can delete duplicate files, empty folders, temporary files, check the installed packages, links incorrect blanks along with other tasks that will allow us to maintain our Linux in optimal conditions.

Testing
FSlint can be download from the official site, it can be tested in a few steps from your terminal:
$ wget http://www.pixelbeat.org/fslint/fslint-2.40.tar.gz
$ tar -xzf fslint-2.40.tar.gz
$ cd fslint-2.40
$ cd po && make
$ cd ..
$ ./fslint-gui


Installation

If we have one of the best-known distributions such as Ubuntu, Fedora, Debian ... it can be installed from the repositories by typing a single command in the terminal:

* For those under debian
$ sudo apt-get install fslint
Can find it here Applications> System Tools> fslint
Or type
fslint-gui at terminal

* For those under Redhat
$ sudo yum install fslint

Enjoy Using Linux

Customize or Remaster ubuntu 9.04 jaunty from an image file

This tutorial will show you how to customize and remaster your ubuntu 9.04 jaunty using a jaunty iso file.

1. Create a work directory

# mkdir jaunty

2. Create the following directoires
# mkdir jaunty/cdrom
# mkdir jaunty/tmp
# mkdir jaunty/root

3. Mount the jaunty iso image on jaunty/cdrom directory
# mount -o loop jaunty.iso jaunty/cdrom
4. Copy everything from the cdrom to jaunty/image directory
# cp -r jaunty/cdrom jaunty/image
5. Now the image directory has the content of your cdrom

We are going to rebuild filesystem.squashfs under jaunty/image/casper

Move the filesystem.squashfs image to jaunty/tmp directory

# mv jaunty/image/casper/filesystem.squashfs jaunty/tmp
6. Mount the filesystem.squashfs under jaunty/root direct
# mount -o loop jaunty/tmp/filesystem.squashfs jaunty/root
7. Copy the contents of fileystem.squashfs to jaunty/remaster
# cp -r jaunty/root jaunty/remaster
8. Copy resolv.conf and sources.list from the host system
# cp /etc/resolv.conf jaunty/remaster/etc/
9. Preserve original sources.list.
# cp jaunty/remaster/etc/apt/soures.list jaunty/remaster/etc/apt/soures.list.backup
# cp /etc/apt/sources.list /jaunty/remaster/etc/apt/

Make sure that sources.list points to jaunty archive

10. Now you can chroot to jaunty/remaster
# chroot jaunty/remaster
11. Now run the following ( You are inside chroot )
# mount /proc

# mount /sys

# mount -t devpts none /dev/pts
The above commands mount the respective directories inside chroot.

12. Now you can install/remove necessary packages using apt.

eg:
# apt-get install vlc
# apt-get remove gimp

13. Cleanup the unwanted files.

# apt-get clean
# rm -rf /tmp/*
# rm /etc/resolv.conf

# umount -l -f /proc

# umount -l -f /sys

#umount /dev/pts

14. Now replace the sources.list with the original sources.list

# cp jaunty/remaster/etc/apt/sources.list.backup jaunty/remaster/etc/apt/sources.list

15. Repack squashfs:
# mksquashfs remaster image/casper/filesystem.squashfs -e remaster/boot
16. Recreate filesystem.manifest& filesystem.manifest.desktop:

Run the following commands.

# chroot remaster dpkg-query -W --showformat='${Package} ${Version}\n' | tee image/casper/filesystem.manifest

# cp -v image/casper/filesystem.manifest{,-desktop}

# REMOVE='ubiquity casper live-initramfs user-setup discover xresprobe os-prober libdebian-installer4'

# for i in $REMOVE
do
sed -i "/${i}/d" image/casper/filesystem.manifest-desktop
done

17. Recreate md5sum

# cd image && find . -type f -print0 | xargs -0 md5sum > md5sum.txt

18. Copy filesytem.squashfs manifest to imag dirtorey

Recreate the iso image:

# mkisofs -r -V "$IMAGE_NAME" -cache-inodes -J -l -b isolinux/isolinux.bin -c isolinux/boot.cat -no-emul-boot -boot-load-size 4 -boot-info-table -o ../ubuntu-jaunty-remix.iso .
# cd ..

Now your remastered ubuntu 9.04 jaunty is achived.

Now install the image on to a hard disk.

Monday, August 3, 2009

Howto Add a User to Sudoers List On Ubuntu

Believe me or not i am replying this, howto add a user to sudoers list on Ubuntu, question every day so after sending my last reply to this question here is the blog post to stop getting this question as an e-mail :) Like my all blog posts this is also verified me on Ubuntu Karmic, PClinuxOS 2009.2.

Open a terminal (alt+f2 gnome-terminal , use a dropdown terminal, whatever you want.) and give this command as ROOT :

$su -
Enter your root password (or your username's password on some distros)
#visudo

Now use your Up/Down arrows (you may prefer PgUp and PgDn keys) and navigate to this line :

root ALL=(ALL) ALL

Under that line add this line (DO NOT FORGET TO CHANGE "user" part with your username!) :

user ALL=(ALL) ALL

You can use Shift + Insert to paste.
To save, write :w (hit enter of course) to save.To exit, write :quit and hit enter.I am poor at vi/vim or whatever you call that :)

Linux forensics - Part 2: Protech

What is Protech?

Protech is a young, new distribution, based on Ubuntu and running an extremely streamlined, lightweight Fluxbox desktop. While little known to the public, Protech offers stability, good looks and usability, and a mind-boggling range of administration tools, a very valuable set in the hands of any power user.

The choice of the tools included in the CD makes Protech an almost almighty weapon in the hands of a skilled admin - and this might be exactly the very problem with Protech; like any super-tool, it takes quite a bit of knowledge to operate properly and to maximum extent.

Still, Protech can be used just as any other desktop distro. Most users will appreciate the range of tools available, but they will most likely never take full advantage thereof.

Enough idle talking. Let's see what Protech offers. Version tested: ONE!

Desktop

Unlike Helix, Protech is a pure Linux distro. It boots into a very spartan, yet business-looking desktop. Right-click is the word here. Like any Fluxbox desktop, it hides away the menu behind the right mouse click.

Boot screen

Applications - a never ending list

Protech has too many of them. Sounds funny, but think just about any diagnostics, benchmarking, backup, rescue, recovery, enumeration, password cracking, sniffing, scanning, analyzing tool ever conceived. That's it. Protech has them all.

I'm going to show you a few of them, just to whet your appetite.

For starters, Hamachi VPN, OpenVPN, NTFS configuration tools, VNC server, Wireless Network Drivers configuration tool.

Apps 1

Then, we have the standard Ubuntu Network Tools pack, with the basic set of utilities. We can also use Telnet and RDP to communicate with remote hosts.

Apps 2

Security applications

Security wise, Protech bursts with goodies. Take only the Database toolbox, for reference. If some of the titles look like gibberish to you, I advise you Google or Wiki them. If you're running an SQL database and suspect it might be vulnerable to attacks, Protech gives you enough tools to run a very thorough diagnostics.

Security apps 1

Remember all the rave with DNS exploits back in the summer (of 2008)? Well, Protech allows you to identify vulnerabilities in your DNS and take proactive steps to keep them safe. The same applies to mail, Web or Samba servers.

Security apps 2

How about catching malware trying to infiltrate your network? That's what honeypots are for.

Security apps 3

Network sniffing? You name it.

Security apps 4

And don't forget the Wireless:

Security apps 5

Now, if you're wondering how to use these tools, then do not, under any circumstances, deploy Protech in a production environment. You may cause more harm than good, to say nothing of ringing just about any bell with the IT security department and getting yourself fired in less than 4 seconds.

I am not demonstrating specific uses, on purpose, because it takes thorough knowledge of the network topography, the network stack and the operating system in general to use Protech tools properly. These utilities are a double-edged sword and will cut you if you misuse them.

My warmest suggestion is to invest time learning until you gain enough skills and confidence to wield Protech wisely. Protech will serve you faithfully as a phenomenal system auditor, but only if you show proper respect.

Extras

Protech also comes with other useful tools. The Opera browser is there. But you also get the GpsDrive, a free GPS software.

GpsDrive

Conclusions

Protech is a mighty tool. I'm thoroughly impressed. The distro is fast and stable, it's good looking enough to become a desktop if needed, it contains a broad range of excellent tools, as well as some unique programs that you do not normally encounter in most distros.

Home users will have little need or use for most of Protech's powerful stock. But system administrators in SOHO environments will definitely appreciate it.

I'll get on a limb here and say that I also think Protech would be quite useful as a demonstration / mentoring package in SANS GSEC workshops, as it contains just about any single tool discussed during the course. It does not necessarily have to replace the existing flavors of Knoppix, as this precious, valuable distro has irreplaceable merits of its own, but it would be a great addition to the white-hat arsenal.

I hope the developers of this fine forensics distro keep up their good work. Protech is a definite keeper.

Linux forensics - Part 1: Helix

In this article, we will introduce and review Helix, a vastly powerful Linux forensics distribution.

For more details about forensics in general, please see the Introduction.

What is Helix?

Helix is a live Linux CD carefully tailored for incident response, system investigation and analysis, data recovery, and security auditing. It is geared toward experienced users and system administrators working in small-to-medium, mixed environments where threats of data loss and security breaches are high.

The most recent version is based on Ubuntu, promising stability and ease of use. Helix has two modes, including pure Linux bootable live CD and the Windows mode, where it can be used in-vivo on top of a running Windows desktop.

Helix is available for download by email registration. We tested version 3 here.

Now, let's see what Helix can offer us.

Linux mode

As said, Helix comes as a live CD, allowing you to use it on a "suspect" machine with its native operating system dormant. It also makes Helix quite useful for network neighborhood auditing, by being able to run from just about any machine on the segment.

Helix boot

The latest version of Helix is based on Ubuntu (used to be Knoppix, in the past), so the minimalistic yet fully functional Gnome desktop comes as no surprise.

Desktop

By default, Helix will display monitors for mounted disks and CPU, memory and network activity.

It comes with a range of useful tools. Bear in mind that the Linux live CD part is only a fragment of the entire arsenal. We will talk about dedicated Windows utilities later.

Tools

The basic kit includes the omnipotent Wireshark network analyzer / packet sniffer, several anti-virus tools, retrieve passwords, backup and restore partitions, browse MAC partitions, examine binary files, and more.

The users can choose between XFPROT and ClamTk anti-virus scanners to examine files and folders on suspect machines, including local and remote disks.

Anti-virus 1

Anti-virus 2

You can also scan Windows registries.

Tools 2

Adepto allows you to create sector-by-sector images of local devices and take them offline for further analysis. It also allows you to restore disks / partitions, which makes it handy for recovery, too.

Tools 3

You can also try to retrieve Windows passwords.

Tools 4

Windows mode

In this mode, Helix is used just as any other CD inside Windows. Double-click to launch the application. You'll be warned about your actions.

Windows warning

The Windows mode differs from the Linux side in being a floating application rather than a complete operating system. Therefore, the navigation is a little different.

First, you have the Quick Launch.

Quicklaunch

Then, there is the Page menu, which allows you to browse different categories of tools.

Pages

The Windows side contains a broad range of highly useful utilities.

The Incident Response page is particularly rich, with lots of excellent programs. Did I say you should be knowledgeable and extremely careful when running these tools, as you can very easily obliterate your system and even cause significant damage to the LAN? There, I said it.

Windows tools 1

An entire section is dedicated to viewing (and retrieving) passwords, cookies and logs.

Windows tools 2

You also have tools for auditing of the system, remote connection (including VNC, SSH), file recovery, and rootkit scanning.

Windows tools 3

Like in Linux, it is possible to acquire entire disk drives (and even the physical memory).

Windows tools 4

You can also browse contents of files and folders, calculate hashes, check time stamps, and more. This allows you to look for suspicious, clandestine activities in your data archives.

Windows tools 5

As mentioned earlier, you can run full audits of your system.

Audit

Conclusion

Helix is a highly useful toolbox. The dual mode is especially valuable, since quite a few system administrators are not that proficient in Linux. Furthermore, it allows Helix users to approach Windows-related problems with several methods, first trying to cope with problems while still logged in Windows and then escalating to the Linux live CD mode.

Helix is a stable, complete package, with a broad range of great utilities that will significantly increase your ability to respond to problems, threats and incidents in your environment.

Linux forensics - Introduction

Most of the time, we do not really care about our computers. They are a means to an end, or many ends. Games, Internet, work, you name it. When everything works, the PC is a somewhat noisy beast that let us do what we want - most of the time.

But what happens when something goes wrong?

Suddenly, your machine won't boot. Suddenly, you have managed to contract malware. Your hard disk is misbehaving, your partitions are gone, your files are gone. These kinds of disasters are all too common. Unfortunately, very few people think about them, let alone prepare for them.

Don't be one of them ...

You can avoid - or at the very least, minimize - risks and damages by exercising a continuous, pro-active approach to integrity and security. It begins with very basic concepts of data backup and simple desktop maintenance and extends beyond disasters into evidence collection and analysis, incidence reporting, vulnerability discovery and patching, and damage control.

In this series of articles, we will talk about specialized Linux distributions that are particularly suited for these kinds of tasks: incidence response, data recovery, security audits, and investigation of system failures. In one word, we will talk about forensics-oriented distributions.

Today, we will just introduce the topic. In the follow-up articles, we will review several highly useful, dedicated forensics Linux distributions.

So, before you start ...

There are some things you need to know.

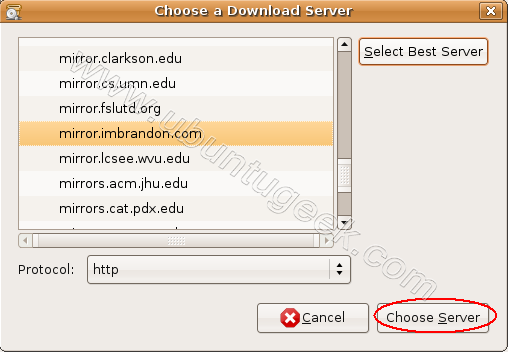
First, you can custom-build your own set for utilities for the task - for example, run Ubuntu, load it with goodies and then create a bootable image with Remastersys - however, you might as well rely on security professional to do the job for you. Let them create the tools; you use them.

Second, analyzing and fixing system failures and security breaches takes a bit of knowledge. Therefore, if you're not really familiar with system internals, either Linux, Windows or both, you might not be able to fully utilize the power of tools presented here. Still, it does not hurt to be aware of them and have them handy, in case of a disaster.

Third, forensics of the kind we are talking about here is the 2nd or even a 3rd level of response. There's much you can do before turning to heavy-duty hacking.

Thus, enter the must-have toolbox for any security conscious (Linux) user:

Must-have toolbox

The tools listed below should always be within your reach. Most of them come as individual live CDs, so you should carry a pouch with you. If you're extra-geeky, you might even use them from bootable USB drives. Whatever the case, you should have them ready for instant use, whether you're at home, work, a friend's place, or traveling abroad.

In no particular order:

SystemRescueCD

SystemRescueCD

This is a live CD specifically geared toward rescue and recovery. The tools package includes some of the most important tools available for Linux user, like GParted, PartImage, Grub, Lilo, sfdisk, TestDisk, and more.

PartImage

PartImage

PartImage is a powerful, friendly disk/partition imaging software, allowing you to quickly and easily backup and recover your entire disks or individual partitions, including the Windows NTFS filesystem.You can learn more about how to use Partimage in my tutorial: Free imaging software - CloneZilla & PartImage - Tutorial. PartImage is included with the SystemRescueCD.

CloneZilla

CloneZilla

Speaking of imaging software, CloneZilla is another powerful candidate for disk / partition backup and recovery; see the tutorial above.

TestDisk

TestDisk

Another extremely important tool is TestDisk. This tool allows to recover lost partitions, make not-bootable disks boot again and restore delete files. It is one of the more effective and powerful utilities on the market. When everything else fails, TestDisk won't. TestDisk is included with the SystemRescueCD.

Super Grub Disk

Super Grub Disk

Super Grub Disk is intended to run from a floppy disk or CD and is used for system rescue. Most importantly, it can be used to restore boot loaders, including GRUB, LILO and even Windows boot loader.

Other tools ...

Even though this article is geared toward Linux users, there's a fair chance they will be asked upon to act on behalf of a Windows friend in need, in which case they should be familiar with Windows tools as well. The best choice for Windows is:

Ultimate Boot CD for Windows

UBCD4WIN

This is one of the most important tools a Windows user can have. It is a complete bootable Windows kernel, packaged with tens of useful utilities in a range of categories.

Among offered tools are 7-Zip, a43, Ad-Aware SE, Agent Ransack, AVPersonal, BGInfo, CPU Bench, CWShredder, DeepBurner, Dirms, Disk Copy, Disk Image, Disk Wipe, Eraser, ERUNT, Explore2fs, ExplorerXP, File Recovery, FileZilla, Firefox, Floppy Repair, Foxit Reader, freeCommander, Free Undelete, HD Cleaner, HDTune, HijackThis, IPScan, IZArc, MaxBlast, MemTest, MbrFix, MBRWiz, Notepad++, Opera, P95, PasswordPro, PDF Reader, Popcorn, PPPOEXP, Putty, R-Linux, RecoveryManager, RegCleaner, Scribe, SmallCD, Stinger, SuperAntiSpyware, Sysclean, UltraVNC, xplorer2, WinDLG, and many more.